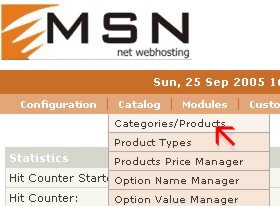
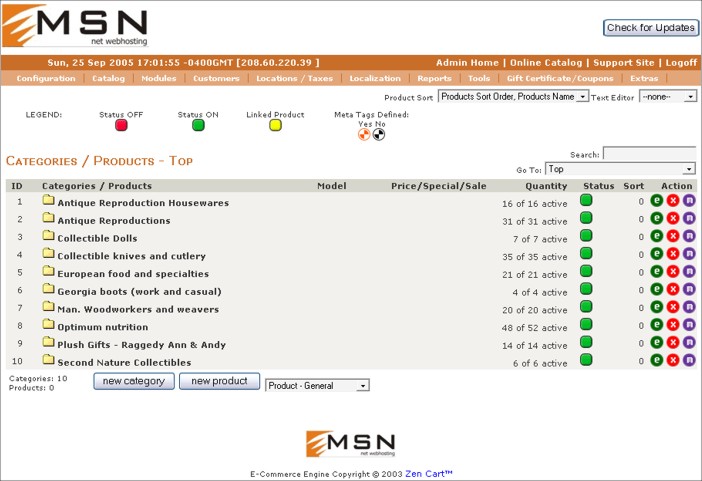
Begin by clicking the 'new product' icon to start adding a new product.
Adding products may seem like a daunting task but remember, most of the
information listed below are just options. Options that are
absolutely required are highlighted in orange.
| Product Status |
Select if your product is in or out-of-stock. |
| Date Available |
You can just leave this item blank to default to today's date, or enter a future date for items that you are expecting to sell soon. |
| Product Manufacturer |
You can usually leave this item as 'none' unless you are selling products that people would also like to view by manufacturer. For example, if you
are selling car audio equipment you might want to allow your brand-loyal customers to search by the product manufacturer (ie: Sony, Panasonic, etc.). If you
feel this would benefit your users you can define product manufacturers by clicking on 'Catalog' in the menu bar and choosing 'Manufacturers'.
Once they are defined, you can define your product's manufacturer by
clicking on the appropriate manufacturer from the drop-down menu. |
| Product Name |
A descriptive but concise name for your product. Try
and use the most descriptive name possible so user's can find your
item when typing in keywords found in the product name. |
| Product is free? |
You can offer a product as free by selecting yes for
this option. This may come in handy when offer a promotional item as
free to promote traffic to your website. See our tutorial:
Generating traffic to your store through promotions for more
information on this. |
| Product is call for price? |
Select yes on this option if you want the customer to call to obtain the product price. This can be useful for big ticket items, or items where you would like to be involved in your customer's purchasing
decision. |
| Product priced by attributes? |
You can leave this as no unless you have attributes for this particular item. We will discuss this below in the attributes section. |
| Tax Class |
This sets the tax class for your product. Since tax classes are predefined and usually necessary for your items, choose 'Taxable Goods' from this drop-down box. |
| Product Price (net) |
Enter the actual price you will be charging for this particular product here. |
| Product Price (gross) |
This is the price with taxes added in and is automatically calculated based on the net product price. You can just skip over this in your product entry process. Taxes will be assessed when your customer begins the checkout process and will not be collected if they are not located in your home state or a state you have a physical presence in. |
| Product is virtual? |
Virtual items are products that do not require any shipping information to deliver the product (ie:software downloads or memberships) Most stores sell physical products so the default selection of 'No, shipping address required' can be left selected. |
| Always free shipping? |
Can be set to yes to provide free shipping for this item.
This may come in handy as a promotional offer to
promote traffic to your website. See our tutorial:
Generating traffic to your store through promotions for more
information on this. |
| Product quantity box shows? |
This will determine if the product's quantity box
will be displayed to your customer. This is basically a personal
preference so select accordingly. |
| Product Qty Minimum |
This is the minimum quantity of the product a
customer must buy. Useful when offering items at wholesale and a
minimum quantity purchase is required. Usually this can be left at 1
for normal purchases. |
| Product Qty Maximum |
This is the maximum quantity of the product a
customer must buy (ie: limit 5 per customer). Useful when offering
promotional items and a maximum purchase limit is set. Usually
this can be left at 0 (unlimited) for normal purchases. |
| Product Qty Units |
Usually this can be left at 1 for normal purchases. |
| Product Qty Min/Units Mix |
This can be left as 'yes'. |
| Product Description |
Enter detailed product information here. Since
customers cannot actually hold and examine your store's products it
is important that you provide your customers with detailed product
specifications and description of your store's items.
Also the more descriptive a description, the more the search
engine's will have to key in on. See our tutorial: Optimizing your
product listings for search engines. |
| Product Quantity |
This is the quantity of product you have on hand to
sell. Our store handles your inventory through this feature. You
can track which items are selling well, how many items you have left
in stock and when to reorder products with this value.
Drop shippers: Since you do not actually have an on-hand
inventory we recommend setting this item at something high (ie: 100
units) and update as necessary. |
| Product Model |
The model number of your product. We recommend using
the manufacturer's model number as this will help your customer's
verify they are ordering the proper model easily and also allow you
to easily reorder your items (since you and your supplier's model
numbers will be the same). |
| Product Image |
This is the picture that will be displayed for your
item. Just click the browse button and locate the picture file on
your hard-drive. This image will automatically upload when you
submit this product. |
| Product URL |
No entry needed here. |
| Product Weight |
The items shipped weight. It is important that you
enter your product's weight because it will be used to calculate UPS
shipping prices. |
| Sort Order |
You can set this value to change the default sorting
order of your products. Products with higher sort orders will be
shown before those with a lower sort order value. For example:
Products with a sort order of 2 will be shown ahead of those with a
sort order of 1. You can leave this blank to use default
alphabetical sorting. |
| Upload to directory |
This is the folder on your webserver your image will be uploaded to. By default this is 'Main Directory', there is usually no need to change this unless you would like to. |
| Overwrite existing image? |
If you are modifying your products image make sure
this is set to yes to overwrite the product's old image. |
Just fill out the appropriate fields when adding your products and click 'preview'. Your
product's picture will be automatically uploaded and you will view a preview of your
item. Choose 'insert' to add this product to your store.