|
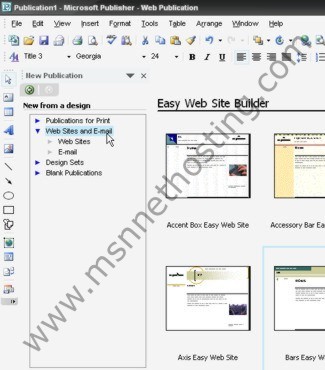
Tutorial: Creating your website with Microsoft Publisher Microsoft Publisher allows you to create an entire website in just a few hours. They provide templates that help your sites look attractive and functional. To start just open Publisher and select 'File > New' for a new project. Then choose 'Websites and E-mail' in the side bar and that will bring up the 'Easy Web Site Builder'. Now select the website template you prefer and Publisher will guide you through adding pages and customizing each webpage of your website.
Tutorial: Uploading your new Microsoft Publisher website Step 1. Ensure that you have your username and password that was given to you in your welcome email. This is the same username/password used to login to your site's control panel at http://www.yoursite.com:2082 that is hosted by us, Pangea Webhosting.
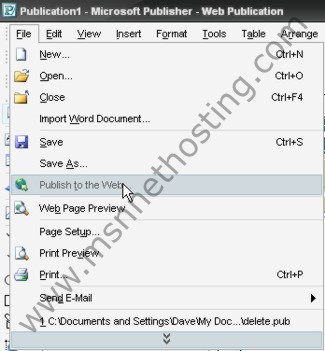
Step 2. Choose 'File > Publish to the
Web' in the Publisher menu.
Step 3.
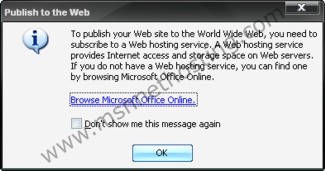
If you see the 'Web Hosting Service' warning just click 'OK'. Your
website is hosted with us (and our service provides Microsoft Frontpage Extensions" so you will have no problem uploading your
publisher website.
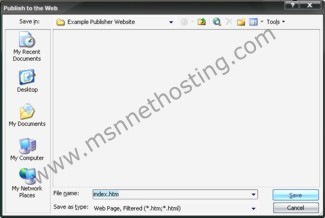
Step 4. Now you will see a 'Save dialog' that will allow you to save
your current webpage.
Step 5. A warning dialog may appear that informs you a filtered HTML file
was created for your webpage. This is the actual HTML file that gets
uploaded to our servers. Just click 'OK' to proceed.
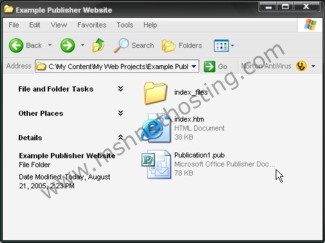
Step 6. Publisher has saved the webpage to your the folder you
specified on your computer's hard-drive. We must now upload it to
our servers so it is viewable when someone goes to
http://www.yoursite.com
Step 7. Open the folder on your computer that has all your publisher
files. You will upload this entire folder to your website's account
via FTP.
FTP is like 'My Computer' for your website. It will allow you
to login to your webspace and view the files on your webserver.
Click here to proceed to the tutorial on uploading your files to our
server.
|
|
Toll-free: 877-467-6932 • Online: Contact Us
Home | Webdesign & Hosting | Register Your Domain | Portfolio • Privacy Policy | User Agreement | Terms of Use | Copyright Information

